This was a two-day affair. A delicious, aromatic, two-day affair that had my housemates and I drooling every time we went into the kitchen. Apple butter. Oh man. It is fantastically simple to make, especially if you have a crock pot. I used this recipe and intend to give out small jars of the stuff as Christmas gifts.

I started Thursday morning peeling apples. I forgot to take a picture of the apples before I started but I think you all know what apples look like. So here they are naked.

How many apples do you need? As many as is necessary to fill your crock pot. The recipe calls for about 4 pounds. I just had a big bag of 'em from the Allins' orchard (thanks!) and I used them all. Remember that when cooking them they will reduce down a lot.
 You need to peel, core and chop the apples up and throw them into the crock pot with sugar and spices. Regular sugar, brown sugar, cinnamon, nutmeg and cloves, and a little salt. You can really put in any spices that go well with apples - I've seen a number of recipes and they all have something different in them. I went with this for simplicity.
I kept part of the chopped apples back until I had put in the sugar and spices so that I would have an easier time mixing everything. This way I didn't have sugar and apples and the like flying all over the place. I stirred everything together and then gradually added and stirred in more apples with the crock pot on low.
 Once it's all in there, pop the lid on and cook on high for three hours. At first it will look kinda like apple pie filling.
 Once it's all in there, pop the lid on and cook on high for three hours. At first it will look kinda like apple pie filling.
But eventually it turns into applesauce, and it makes the whole house smell fantastic. After three hours on high, turn it down to low for another 6-8 hours. Give it a stir every now and then. Make sure you leave the lid open a crack so that the steam can escape and the apples will reduce.
 I, unfortunately, forgot about this part and so by the time I went to bed they were still quite soupy. So I left the lid open a bit and put it on 'keep warm' overnight, and this is what I got on Friday morning.
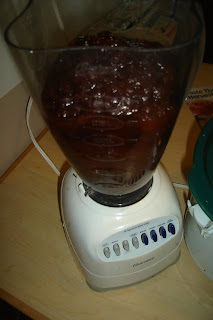
The apples have reduced by half. Before it gets too thick, you need to blend it. If you have a hand blender, rock on, you can do it right in the crock pot. I don't so I had to scoop everything into the blender and then put it back.
 I think I probably should have blended it before I went to bed because the blender seemed a little perturbed at me, but all was well. Then I put it back in the crock pot on low to let more liquid come off it while I studied and went to my (last!) exam.
 You'll know it's done when you put a little bit on a plate and no liquid separates from the butter part. If you wanted, you could throw it in jars and put it in the fridge right from this point. But since I'm giving this away, I wanted to properly can it.
Canning is pretty easy but you need to do it properly unless you want to give someone botulism. The important part is to make sure everything is clean and that you boil everything for long enough. First, wash the jars and lids with hot soapy water. Then boil them for at least ten minutes to sterilize. Or you can just run them through a very hot dishwasher cycle. I did the jars and lids in separate pots so I could leave the lids in hot water while I filled the jars, which I turned upside down on a towel after taking them out of the boiling water. Use tongs for everything because it's HOT. You want to fill the jars with the butter while both are still hot, leaving about 1/4 inch of room at the top. Carefully place the lids on top and screw the rings on almost all the way, then put them back in the boiling water for at least five minutes.
 Carefully remove them from the water. I put a towel on a tray and put them all on that. I got ten jars of apple butter from that one crock pot.
 Then you need to leave them to cool somewhere without drafts for 24 hours. So tomorrow evening I will check the seals by pressing on the tops - if they don't pop, they're good. If they do pop, they aren't sealed right and need to be kept in the fridge and used within about a month. I guess this is really a three-day affair that I'm in the midst of, then.
 A really good guide, if you're new to canning and food preservation like I am, is the US Department of Agriculture's National Centre for Home Food Preservation. Their Complete Guide to Home Canning was really helpful.


 Separate the dough into four portions and wrap them up in plastic wrap.
 Then put them in the fridge for at least two hours before you begin the next part.
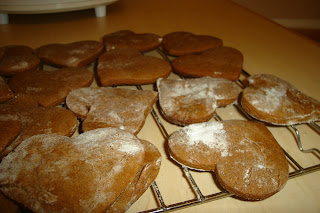
 Roll it out to about 1 cm thick. The original recipe says to do like, 1/8 of an inch, but I felt that was rather thin. Then cut shapes out of it! The classic is rounds, but the only cookie cutter I own is a heart, so that is what I did.
 Also, thank goodness that there were four portions of dough because I forgot to take pictures three times! Gah! But here we are anyway.
 Remove to a rack and let cool. Yummyness.
