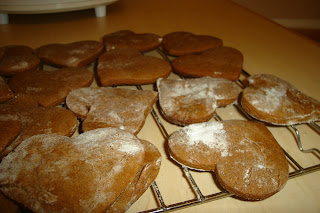
Anyway, I did remember to take pictures of the piparkoogid that I made. This recipe for Estonian gingersnaps was in the Toronto Star last week and looked mighty tasty.
Something I must complain about, though: I really fucking hate it when recipes assume that you have a stand mixer. I would love a stand mixer, I really would. But there's no way in hell I can afford one right now, and neither can a lot of other people who love to bake. So when I see a recipe that states "In a stand mixer with a paddle attachment..." or something similar, I want to smack the writer of that recipe upside the head. HELLO, YOUR PRIVILEGE IS SHOWING. Geez. This is one such recipe. I made it without a stand mixer and it turned out just fine, thankyouverymuch, so I don't know why recipe writers insist on explicitly referencing stand mixers. Sure they're useful, but not entirely necessary. End rant.

So here are your ingredients:
3-1/2 cups all-purpose flour, sifted1 tsp baking powder
1 tsp cinnamon
1 tsp ginger
1 tsp ground cloves
1/2 tsp salt
1 cup unsalted butter, room temperature
1 cup sugar
1 large egg
2/3 cup fancy grade molasses
2/3 cup fancy grade molasses
First you mix together the flour, baking powder, and all the spices in a bowl. Set that bowl aside.

In a different bowl (or a stand mixer if you have one), beat together the sugar and butter. Add the egg and beat that in too.

Then you add the molasses. I just thought the molasses looked really cool so I took this next picture.

Slowly pour it into the sugar/egg/butter mixture and beat it together.

Once that's all mixed together, slowly add the flour mixture to it. Be careful not to overshoot the bowl and make a mess like I did.

See that! A hand mixer! Hah!
Ahem.
Anyway. Then you will have dough.
 Separate the dough into four portions and wrap them up in plastic wrap.
 Then put them in the fridge for at least two hours before you begin the next part.
After that agonizing wait, take the dough out onto a well-floured surface. Preheat the oven to 350F and line two cookie sheets with parchment paper.
 Roll it out to about 1 cm thick. The original recipe says to do like, 1/8 of an inch, but I felt that was rather thin. Then cut shapes out of it! The classic is rounds, but the only cookie cutter I own is a heart, so that is what I did.
 Also, thank goodness that there were four portions of dough because I forgot to take pictures three times! Gah! But here we are anyway.
Carefully transfer the cookies to the baking sheet with a spatula. Bake for 10 minutes, switching racks halfway through. Again, I deviated from the recipe here - it said 14 minutes but I felt that was too long - especially with how thin it said to roll the dough. And I like chewier rather than crispier cookies anyway. So there you go.
And then they will be done!
 Remove to a rack and let cool. Yummyness.

No comments:
Post a Comment
Note: Only a member of this blog may post a comment.